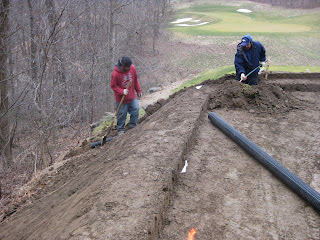
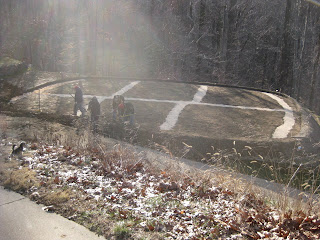
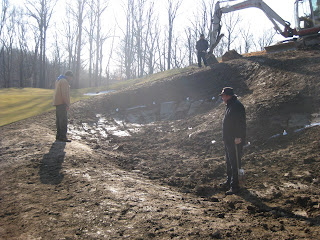
The removal of the old forward tee on #7 is complete. Here is the finished look:
Friday, February 17, 2012
Wednesday, February 15, 2012
#18 Stacked Sod Fariway Bunker
Wanted to share pictures of the process for re-building this bunker. The method has been described in an earlier post. However the pictures really show the extent of the work done. Please remember, this bunker was built higher then before so water would not drain directly into the bunker and to take into account any settling which will occur.
Tuesday, February 14, 2012
Frost Delays/Course Closing
The crew from McDonald & Sons Golf Contractors is finishing up their work today. In the following days I will be posting photos of the stack sod bunker in #18 fairway and the removal of the old forward tee on #7. The completed work looks great!
While out on the course today I realized that some may have questions as to why we have frost delays or close the course when the holes around the clubhouse look frost and snow free. While this is true, there are holes on the interior and far side of the course that for various reasons stay colder and the frost and snow are still present.
Also, when we get into freeze and thaw periods root shearing can occur. This is when the top 1/2 to 1 inch of the soil is thawed out but the soil below is not. Therefore traffic causes the top, unthawed, layer to move and literally cuts the roots away from the area below which is frozen. Of course we do not want this to happen!
Friday, February 10, 2012
Winter Shutdown Renovation Work-#7 Forward Tee
The rocks are out from the old forward tee. They will be hauled away to be used for future use. The soil will be spread and grassed over:
Thursday, February 9, 2012
Winter Shutdown Renovation Work-Stacked Sod Bunkers
As of Thursday morning, Kyle Trzaskos and his team from McDonald and Sons Golf Course Contractors have completed the new bunker on hole #2, expanded the tee on hole #3 and re-built the stacked sod greenside bunkers on holes #11 and #18. Currently they are working on the large stacked sod bunker in the middle of #18 fairway. Their final task for this winter is to remove the old forward tee on #7. They could be finished as soon as early next week if the weather cooperates.
Would like to go through the process of building the stacked sod bunkers and point out some changes we made to the construction to ensure that these bunkers will last for as long as possible. All stacked sod bunkers need to be replaced on a consistent basis but the goal is to increase the time between re-builds.
First the old sod is removed:
Notice the trench dug at the base of the wall. Perforated drain pipe is installed in this trench and backfilled with gravel. This is something that has not been done in the past and will get rid of any water seeping through the soil before it gets to the stacked sod. The gravel is filled between each layer of sod and the bunker wall.
This picture shows another new method of construction which is stacking the sod face up then face down. So the two grass sides touch each other and the two soil sides are in contact:
Another important feature that we are incorporating is that when the sod is laid it is offset about 1/2 inch from the previous layer creating a batter. This gives the stack sod much greater strength:
Every few layers a compacter is used:
Another very important change is that the stacked sod is laid above the original grade and the grade slightly changed behind the bunker so water from rainfall will not go directly into the bunker. Instead the water moves away from the bunker on either side:
We also had the sod cut as thick as possible and added sand in between the grass layers. This helps decrease the amount of organic matter decomposition. The finished product on #11:
Completed greenside bunker on #18:
Tuesday, February 7, 2012
Winter Shutdown Renovation Work-#3 Tee Construction Process
We have greatly increased the teeing space on #3 tee by combining the white tees with the blue tees. This was done by raising the white tee 18 inches and lowering the blue tee 18 inches. The result is approximately 40% more teeing space! The goal is to give divots additional time to recover. By adding the space we have more areas where we can place the tee markers giving divots added recovery time.
First the existing sod was removed from the tees:
Next the rock wall that separated the blue and white tees was removed:
Then the soil from the blue tee was used to fill the white tee:
Next, drainage trenches were dug. Perforated pipe and gravel were installed:
We decided to use a special tee mix that consists of 70% sand, 20% topsoil and 10% agresoil. The agresoil holds nutrients and slowly releases them. Notice the specialized equipment called Thwaites used by McDonald and Sons to bring the mix in. It is the yellow machine in the second photo:
Once the tee mix is installed a laser is used to make sure the grade is correct. There is a receiver on the tractor that picks up the beam from the laser and automatically adjusts the blade on the back of the tractor to insure it's on-grade:
Finally the tee is hand prepped and sod is laid:
The finished product:
Monday, February 6, 2012
Winter Shutdown Renovation Work-#2 Bunker
Wanted to go through some of the steps we took to build the new bunker on hole #2. First the three small stacked sod bunkers were removed:
Then, David Whelchel from Hurdzan/Fry Environmental Golf Design came to inspect the shaping. In this picture David (in black jacket with paint gun) discusses how far up the sand will go with McDonald & Sons Project Manager Kyle Trzaskos:
Next, we had to remove some rocks from the base of the bunker:
However not all the rocks were small enough to be removed so a rock hammer was brought in:
Then drainage trenches were dug:
Next a liner was installed:
Then the drainage pipe and gravel:
Sand is installed after the drainage pipe:
Then sod:
Finished product:
Saturday, February 4, 2012
Winter Shutdown Renovation Work-#11 Stacked Sod Bunker
Work is now complete on the stacked sod bunker in front of #11 green. The crew from McDonald and Sons has done an excellent job! This bunker and the two stacked sod bunkers on #18 are being re-built in a very different manner then what was previously done. This is to ensure these bunkers will last several years before needing to be re-built. In a future post I will go into detail as to what these differences are. For now here is a before and after photo:
Thursday, February 2, 2012
Winter Shutdown Renovation Work-#3 Tee
On hole #3 we raised the white tee 18 inches and lowered the blue tee 18 inches to create one tee. This has given us almost 40% more teeing space! In future posts I will go over the details as to how this was done. For now, here is a before and after photo:
Subscribe to:
Posts (Atom)


